
My first build of 2022 is done! This kit was for a really fun group build that I took part in that had the goal of building the oldest kit in our backlog- as builders we all probably have that one kit that’s been languishing away in our backlog for a number of years. Maybe we started it and just stopped feeling it, or ran in to an issue and didn’t want to continue. Whatever the reason, there’s always an “Oh yeah, I should really finish that” feeling looming over a kit that’s been in the backlog for so long.
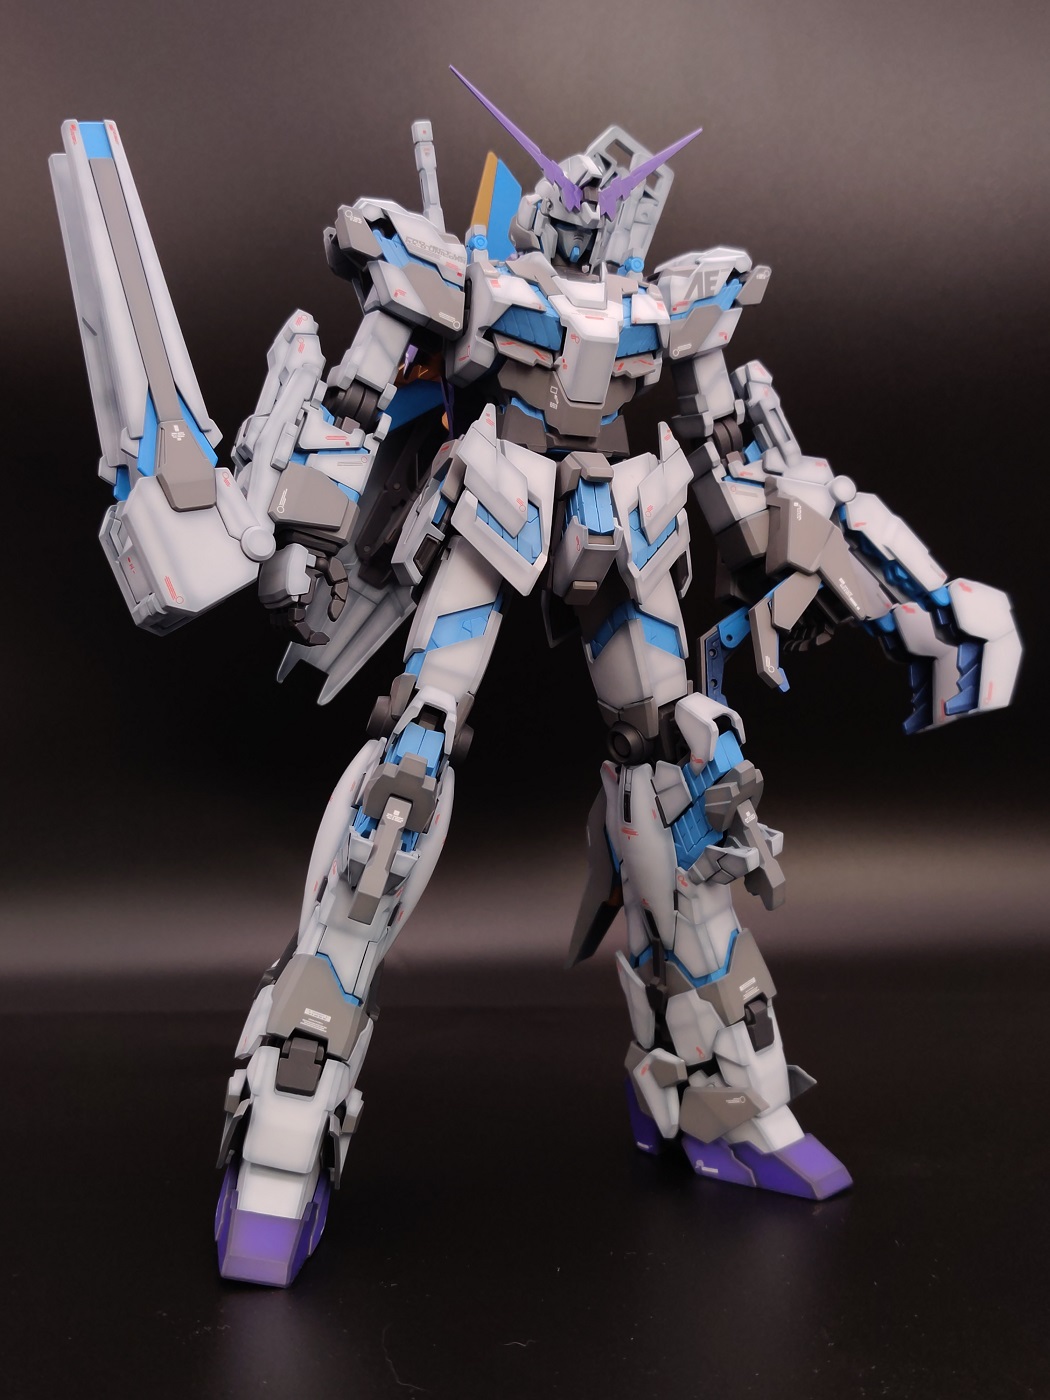
This kit needed to be done by the end of February for group build’s the ‘due' date’ and I fell a little bit short of that goal with the build wrapping up last weekend on 3/6 but I’m still satisfied with the push I made to get this done in the middle of Midwest Winter; cold temps and dry air will always make it that much more of a slog to finish painting a model. I went with my favorite colors on this kit, those being sky blue and purple with some metallic accents to make everything pop. The final build used the below paints:
- Internal frame painted with GaiaNotes NAZCA mechanical surfacer Heavy + Super Heavy
- Armor and psychoframe parts primed with GaiaNotes NAZCA mechanical surfacer Light
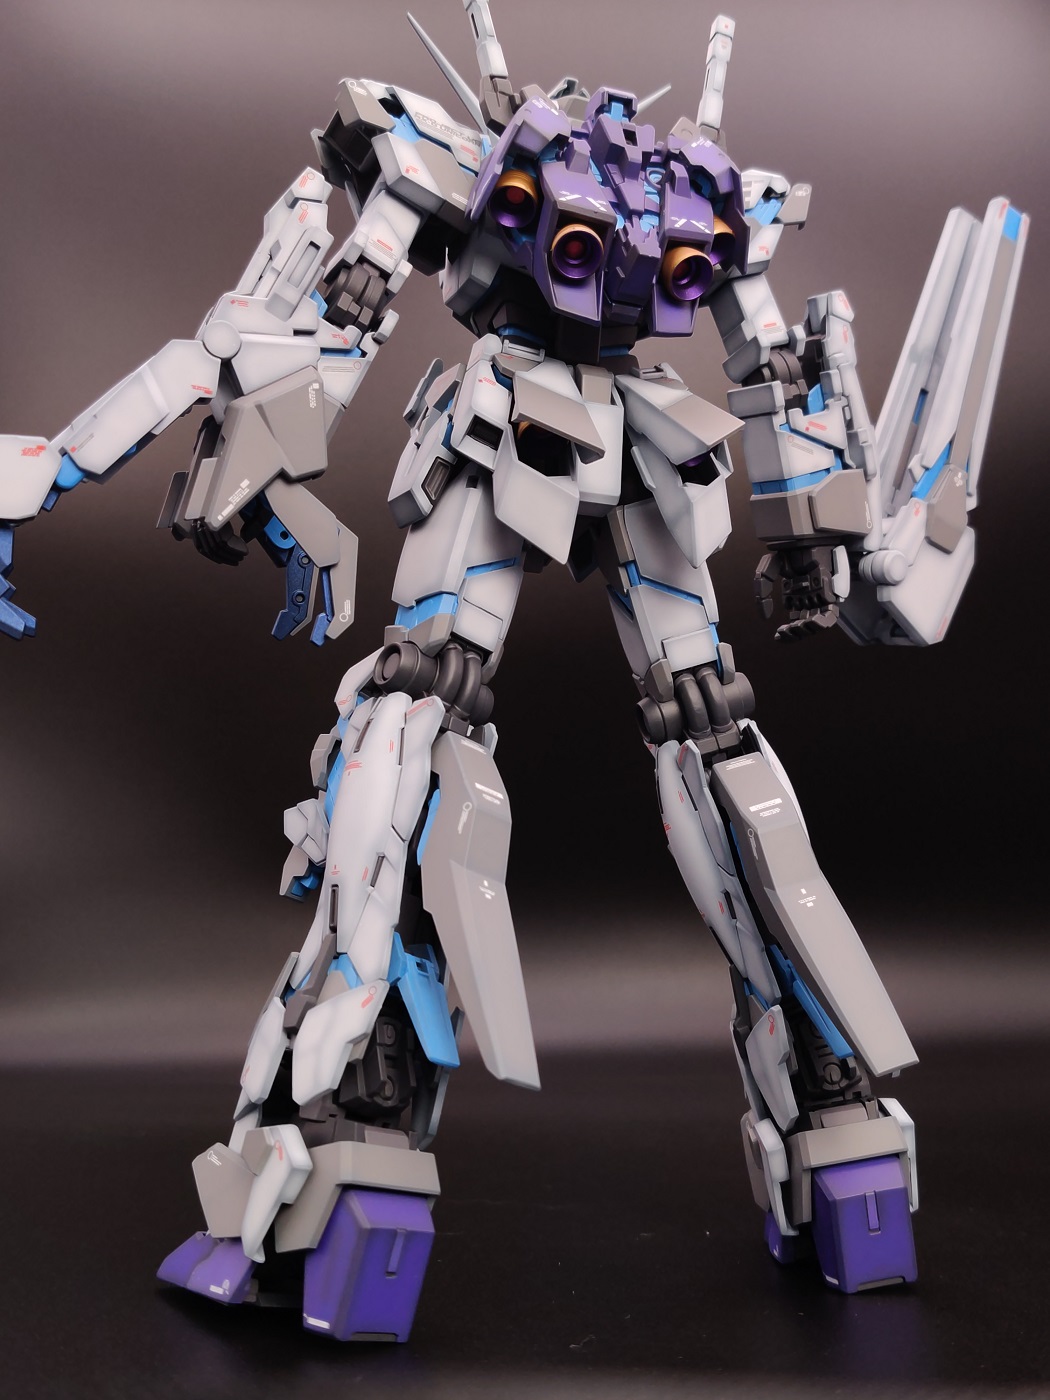
- Psychoframe parts painted with Mr. Color C-34 Sky Blue
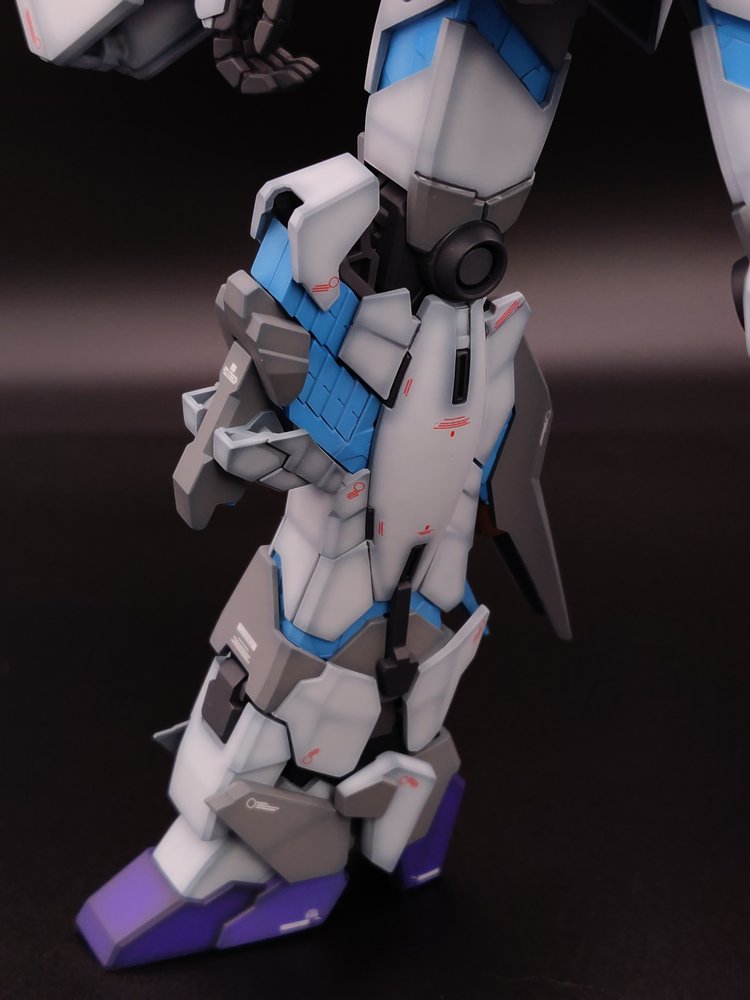
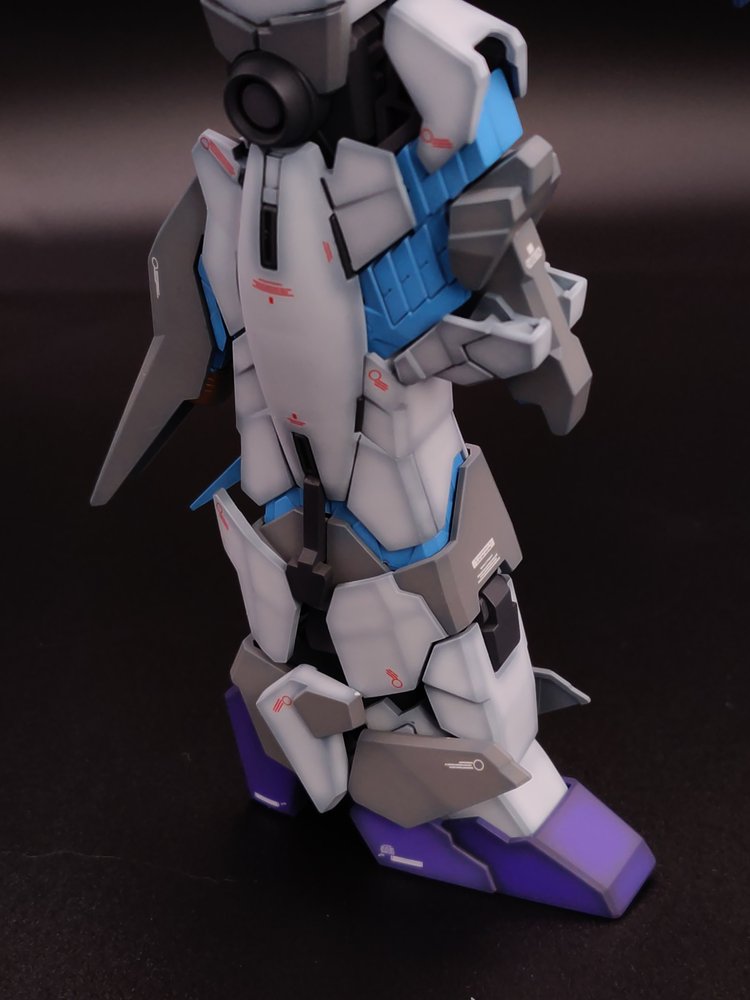
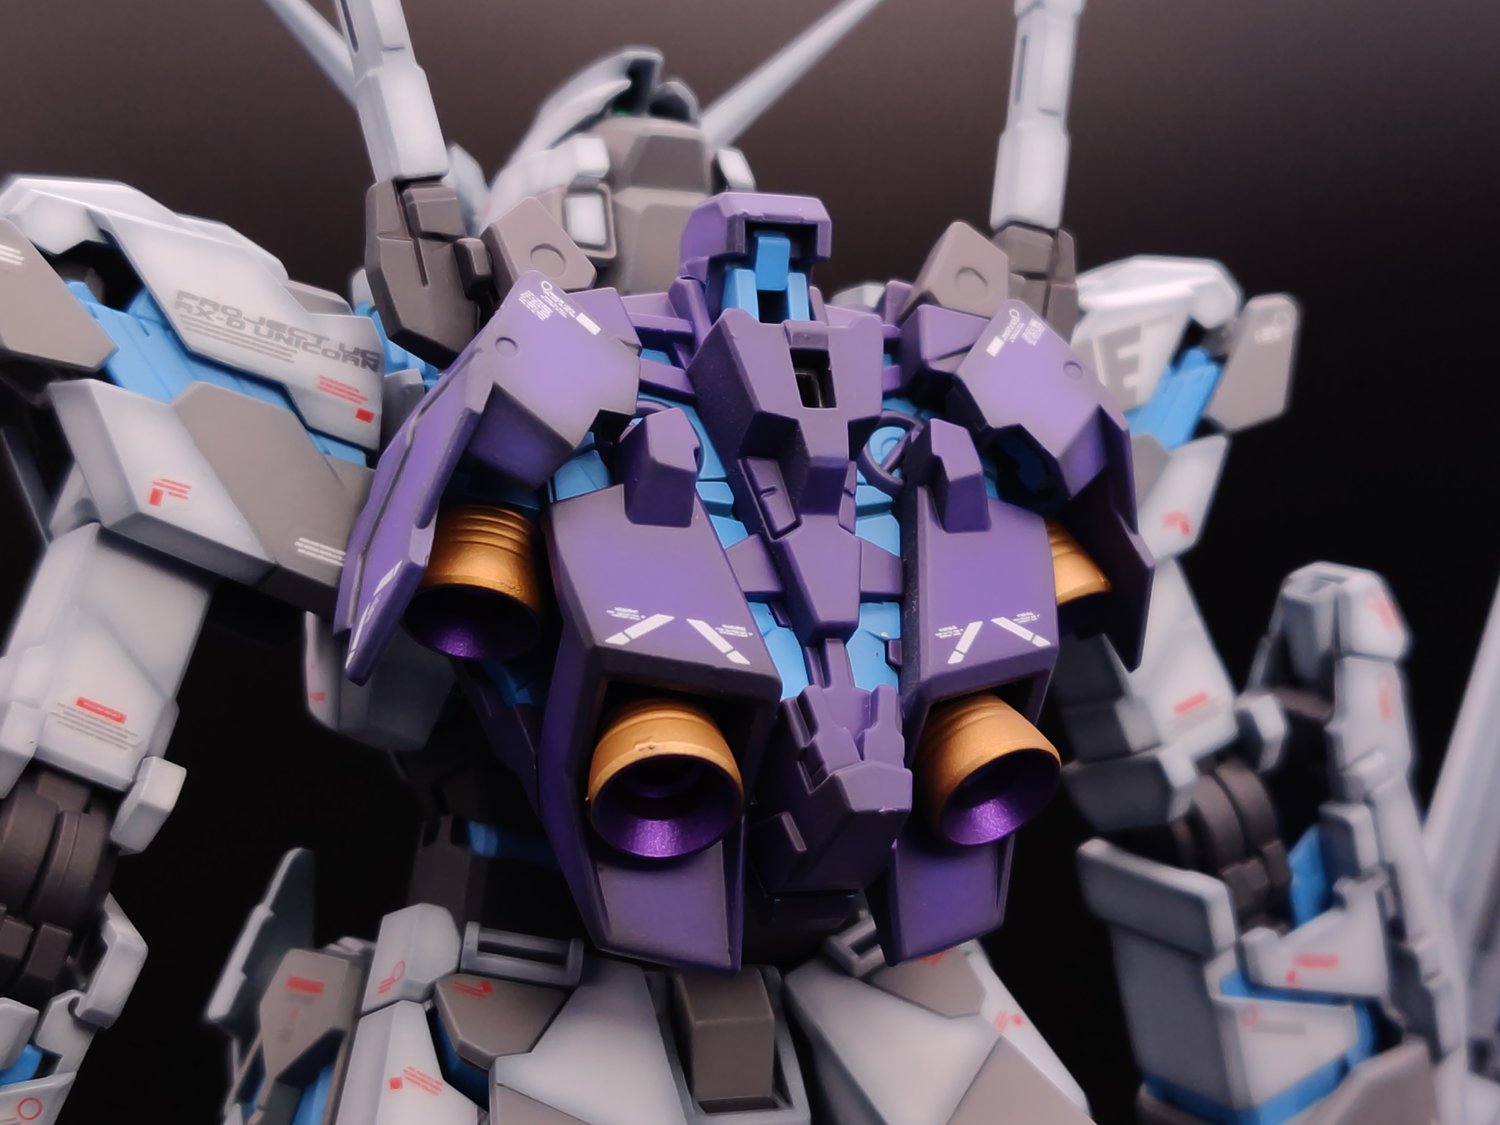
- Feet, V-Fin and backpack painted with GaiaNotes 017 Purple Violet
- Preshade done with GaiaNotes 063 Medium Blue
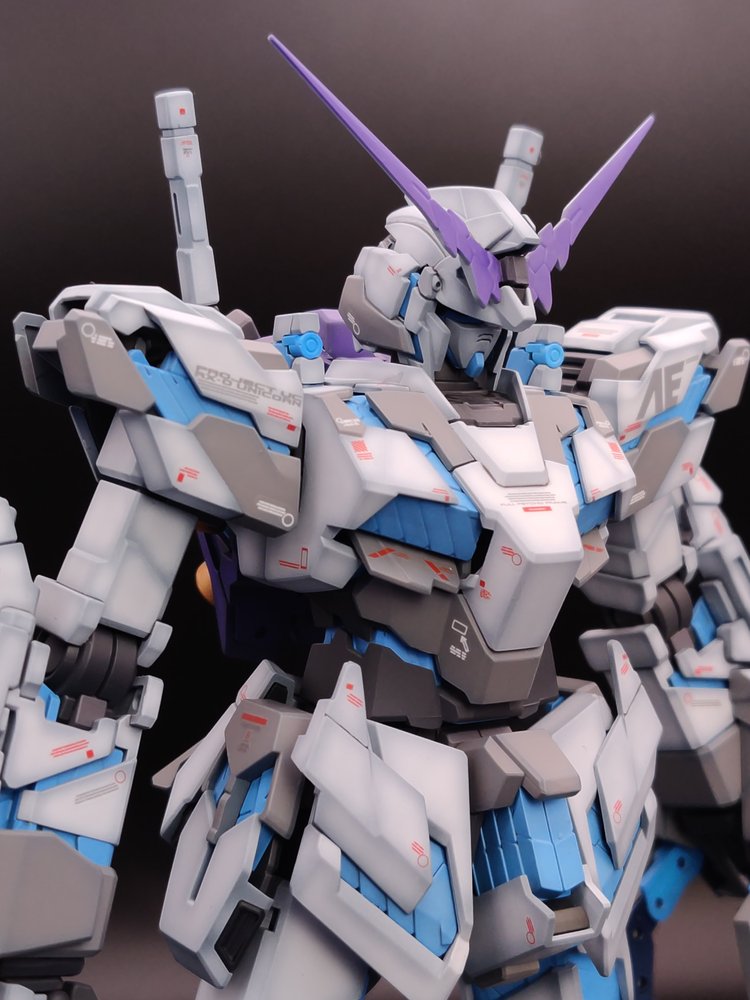
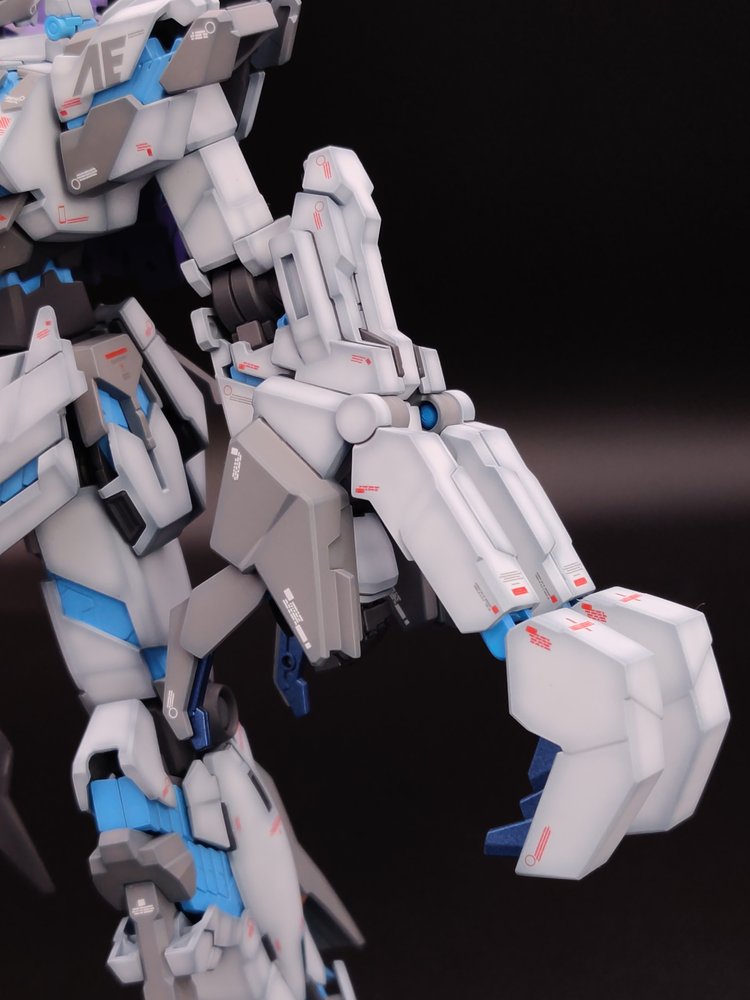
- Main armor painted with GaiaNotes NC-001 Steel White
- Grey armor parts painted with GaiaNotes 073 Neutral Grey III
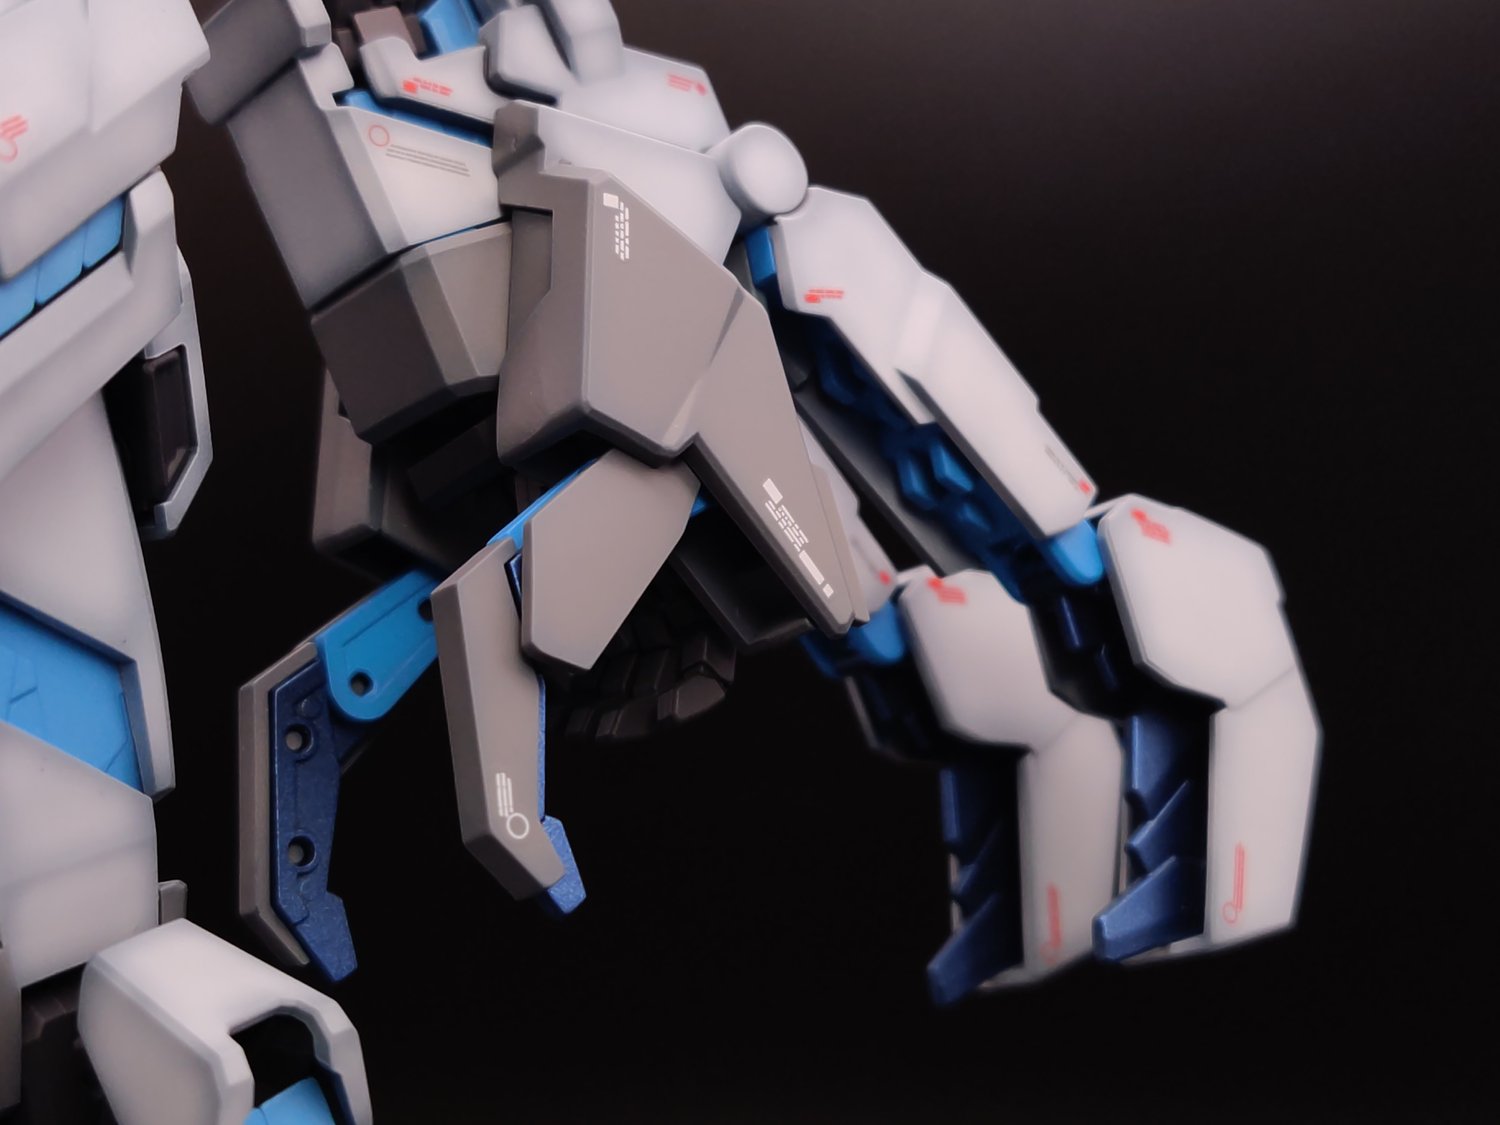
- Thruster bell exterior painted with GaiaNotes 010 Bright Gold, interior with Mr. Metallic Color GX 207 GX Metal Violet, attachment point painted with Mr. Metallic Color GX 202 GX Metal Red
- Edge of the shield painted with GaiaNotes 010 Bright Gold
I had also initially planned a variety of mods for this kit like extending the ankle posts so the feet could sit flat and increasing the bend on the knees but in order the kit done anywhere close to on time I wound up scrapping all those plans and set to work painting things.
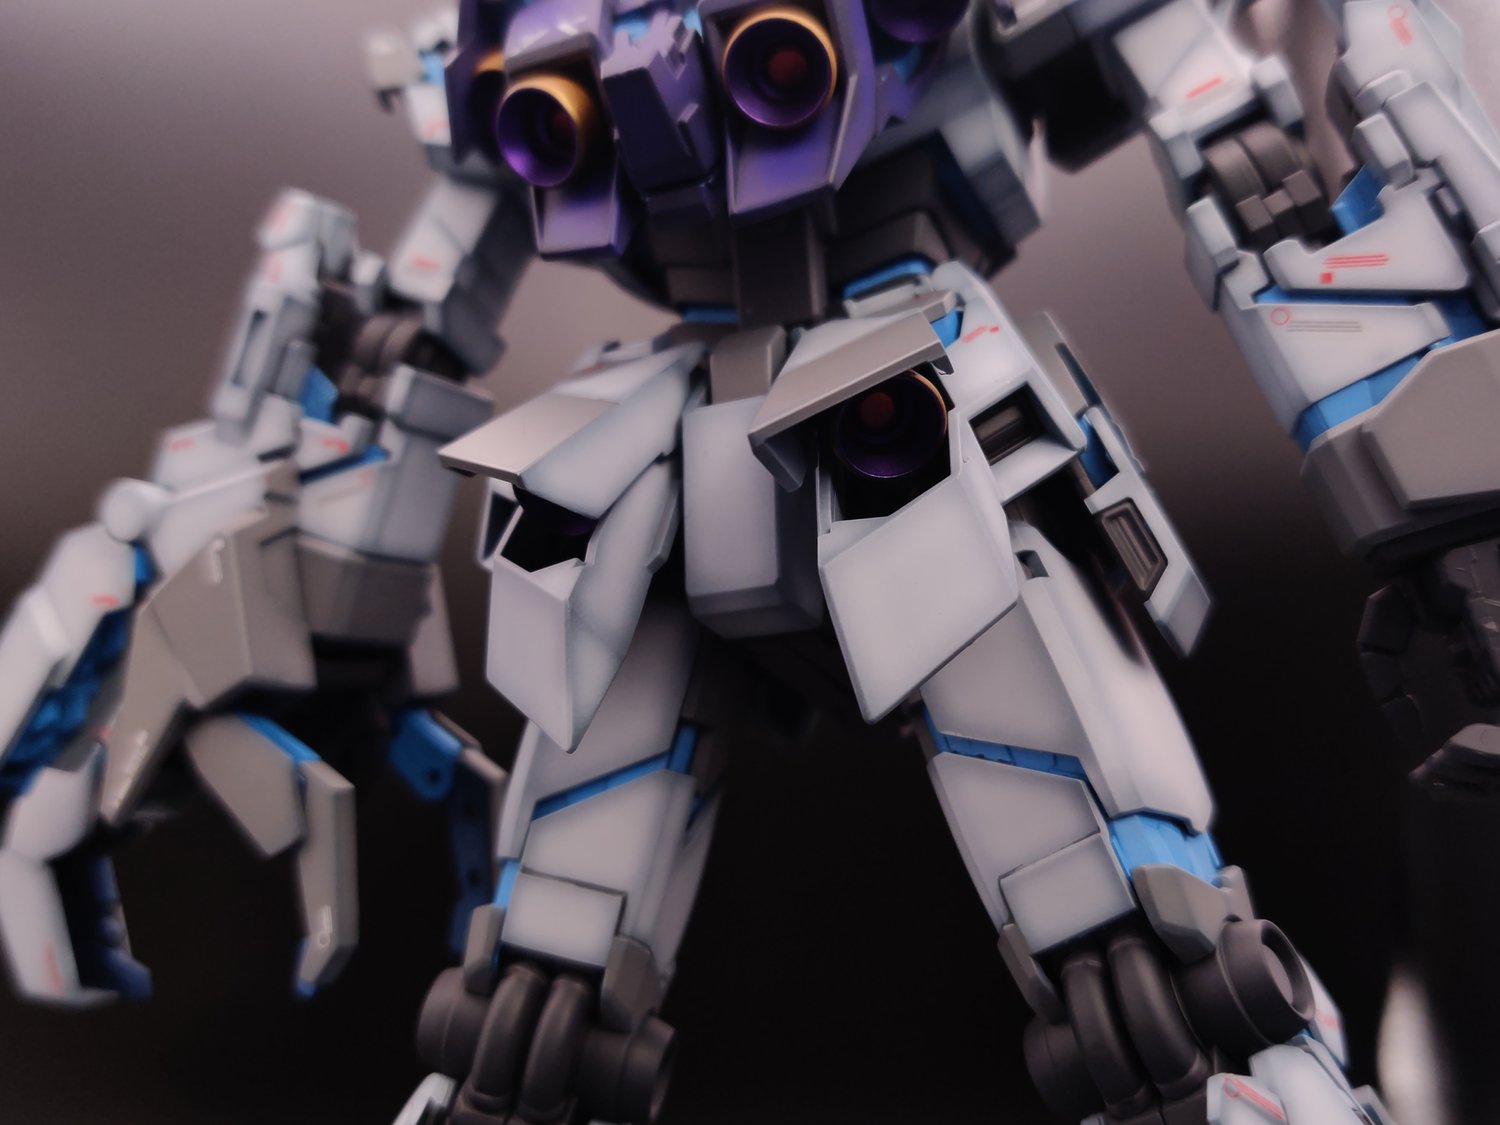
In my WIP post I talked about all the other MG Unicorn/Banshee model’s I’ve made over the years and how for each of those builds I opted to leave the psychoframe “as-is”. To really make this build unique to every other Unicorn model I’ve made so far, I made the call to paint the psychoframe on this one. This created a few issues during the assembly because the fit and clearances we’re working with on this kit are already a matter of millimeters, to the point that I had to very carefully assemble the kit in Destroy mode to try to avoid any chipping. It wasn’t too difficult to do this since most of the moving mechanisms are on the regular parts of the frame but there were a few sections on both the wrists and upper thighs that suffered some scratches due to just how tight the fit had become on those parts because of a few layers of paint. It was nerve wracking to fix them but thankfully in the case of the wrists the Armed Armor equipment completely covers where the chips were. Painting the psychoframe is very challenging on any Unicorn kit (I can’t imagine being able to preserve the transformation and painting the psychoframe on the RG) but it really aids in creating a unique look for the build.
The decals I used on this kit are a blend of the Gundam Decal vol. 44 MG Unicorn ver. Ka decals, the SIMP E36 MGEX Unicorn Gundam decals and a smattering of decals from the set included with the MG Nu ver. Ka. I had a few sets of the GD44 decals tucked away for a rainy day but when I started assessing where this build was at discovered that I’d used the decals that go on the inside of the chest flaps for another Unicorn build which is what necessitated purchase of the E36 decals. The Bandai decals from the Unicorn and Nu were fairly simple to use but I did have some struggles while learning how to properly apply the E36 decals that resulted in a multitude of wasted decals and having to try some alternate decal placements to account for my mistakes. The E36 decals do have a much thinner profile to them though (the edge of the decal is almost nonexistent after topcoating) and I think the improvement in final appearance is worth the extra steps it takes to properly set these decals. I used the MG ver. Ka decal guide for the majority of the build because of the difficulty with the E36 decals but did have some room to get creative and go outside the lines due to the decal’s grey text not showing up well on the parts that I painted grey. The Nu ver. Ka decals were indispensable for this reason and it was nice to have some room to go “outside the lines” and make this build my own in that way.
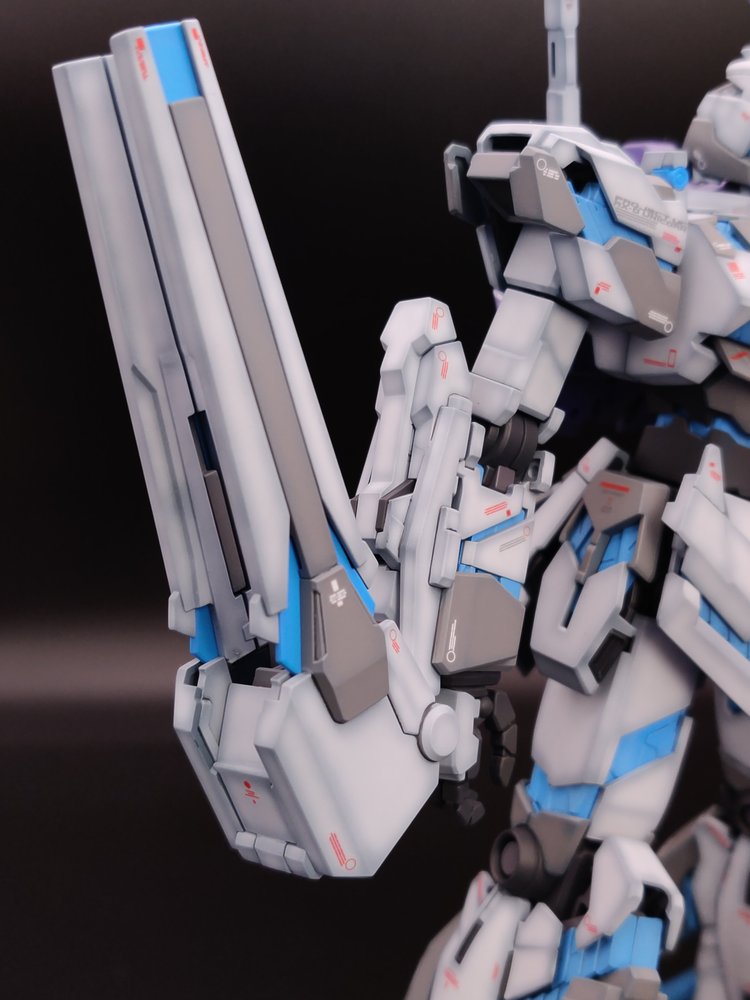
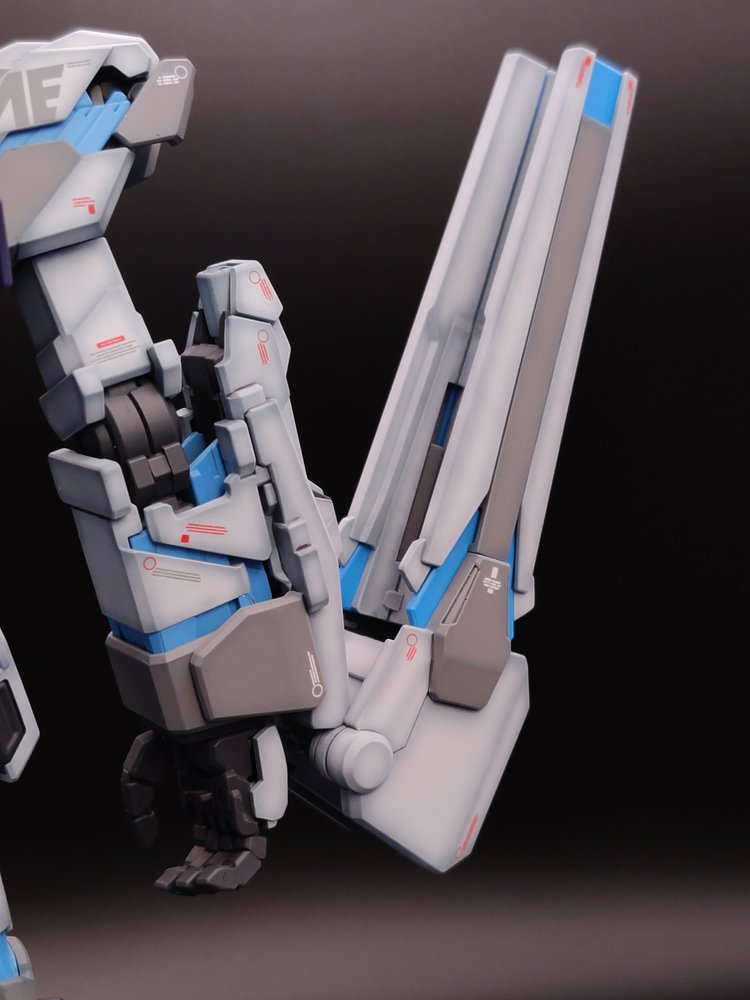

I took the Armed Armor BS and VN from the second oldest kit in my backlog, a Banshee (OVA ver.) and gave them to this kit because I just adore those weapons. The MG Armed Armor VN is lacking in both design and how it poses when it’s on the finished model compared to the RG and PG offerings but with a little color separation added it still looks plenty menacing when it’s opened up. The beam smartgun always looks great in any scale and the MG iteration is definitely better than the RG due to the latter’s lack of detail on the inside of the smartgun. The Armed Armor equipment didn’t have a marking guide and so I got to make up what decals I used on it entirely out of my head and as a result they’re one of my favorite things about this build. It can be very easy to go overboard when applying decals but I think I really nailed the perfect balance on these parts.
The thruster bells were another part where I decided to try something new to increase the amount of detail on the final product. This was a little tricky because the verniers typically attach to a baljoint so in order to get the nice 3-tone look I wanted (exterior, interior and where the vernier would ‘fire’ from) I had to take the blue psychoframe parts on the backpack, waist and legs and do some masking around the balljoints so I could paint them red. I was worried about those parts getting damaged while attaching the verniers but thankfully the middle section stayed intact through assembly. It’s worth noting that these vernier parts were taken from my already-completed MG Banshee Norn because of a missing runner, hence the obvious gate marks that are still visible on the backpack. I found the runner for the Unicorn recently and will absolutely be prepping them to put on this build in order to bring it’s “completion level” up a few notches.
Overall I’m really happy with this build- I don’t plan on building another MG Unicorn any time in the near future because I have the PG Perfectibility Divine coming in April/June and the RG Perfectibility hanging out in my backlog half-primed and while I love the Unicorn Gundam I’m trying avoid burning myself out on it like I did in the past. This build feels like a great send off to the kit and suit that got me back in to Gundam and Gunpla all those years ago and it looks stunning next to it’s Banshee (Final Battle ver.) brother on my shelf.
Thanks for reading!