Editor’s Note: You can save 10% on any of the tools below that have a link to MajinHobby attached to them by using code “luper10” at checkout! Using my code directly supports me bringing you more content, so I appreciate you using it when you’re shopping for gunpla tools!

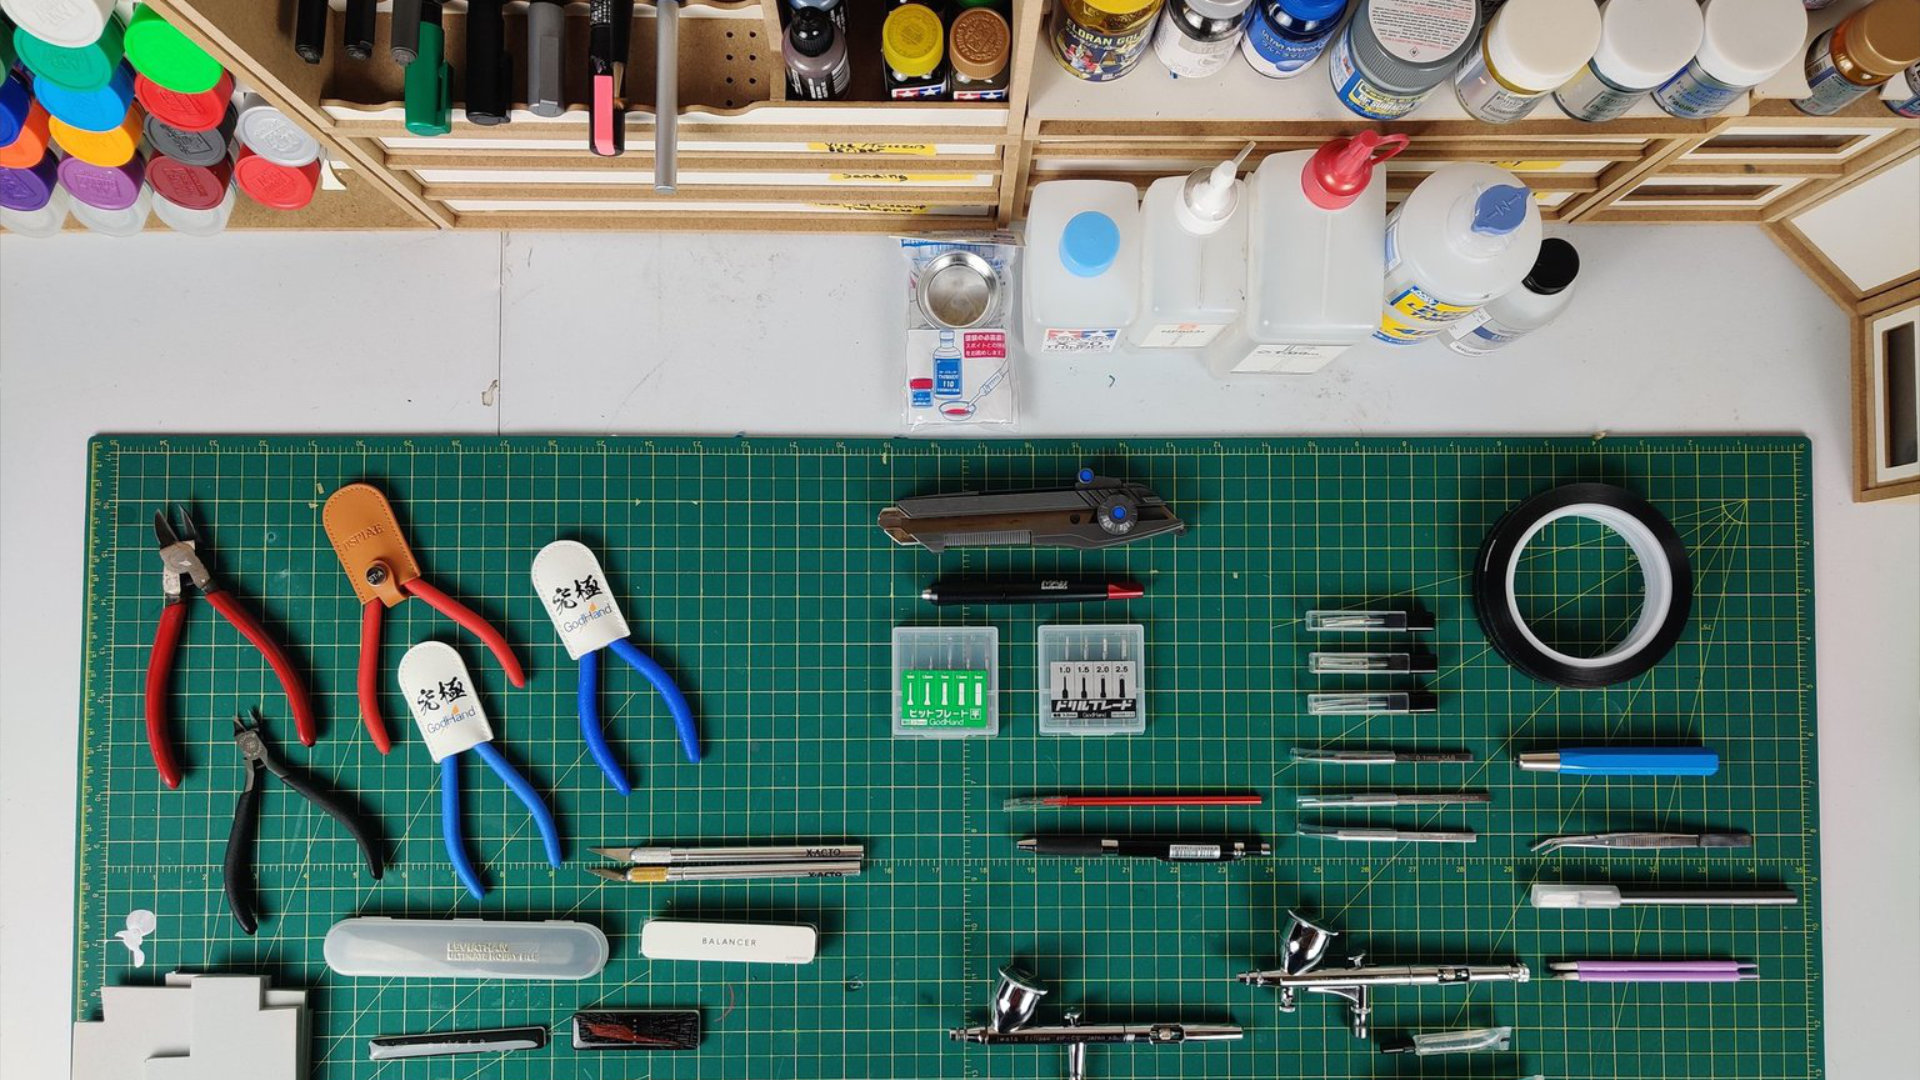
The Tamiya sidecutters are my choice for cutting parts off of the runners while the Godhand/DSPIAE cutters are used to cut the gate mark as flush as possible to the part before sanding. I use the generic hardware store cutters for especially thick gates, clear parts, hacking parts up, or for the first cut on huge resin flash. The Godhand RCN-120s say they’re meant for trimming supports on 3D printed things (thickness of 3mm max) but I intend on finding out how they perform with your standard resin Gundam GK.
The Godhand SPN-120 and DSPIAE ST-A3.0 are both fantastic, premium single bladed cutters. Either one will provide you a fantastic flush cut that will make it pretty easy to sand the remaining gate off. If you’re looking for a workhorse singlebladed cutter, the ST-A3.0 wins out for me due to being cheaper and having some extra goodies like a carrying case included.
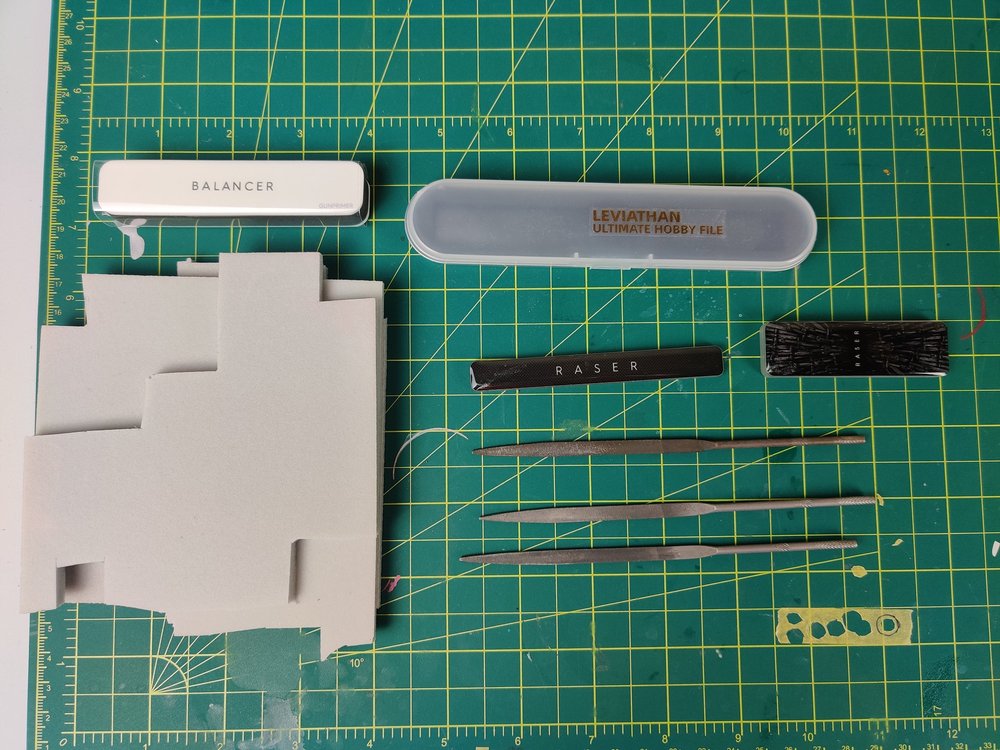
Premium sanding options like the Raser (both the v1.5 and Plus) and Leviathan do work very well but due to the small part sizes and tight spaces gunpla parts force you to work with sometimes, I find myself using the #2 flat metal file the most often for sanding gates. However, for the nubs they can reach and work around easily the Raser files are truly outstanding. It’s hard to oversand with them and they’re especially easy to use on curved surfaces. The Leviathan, I feel, is too large for many gunpla parts but my feelings on that may change over time as I use it more.
The sanding sponges are my finishing tool of choice and I usually use whatever grit is readily available. 1500 grit is my preferred option but I have used 1000 grit when 1500 is too tough to find. Gunprimer’s Balancer is nice and easy to use (as well as being capable of providing a matte or semi-gloss finish) but I do feel you get more bang for your buck out of Tamiya’s sanding sponges if you’re painting your kit.
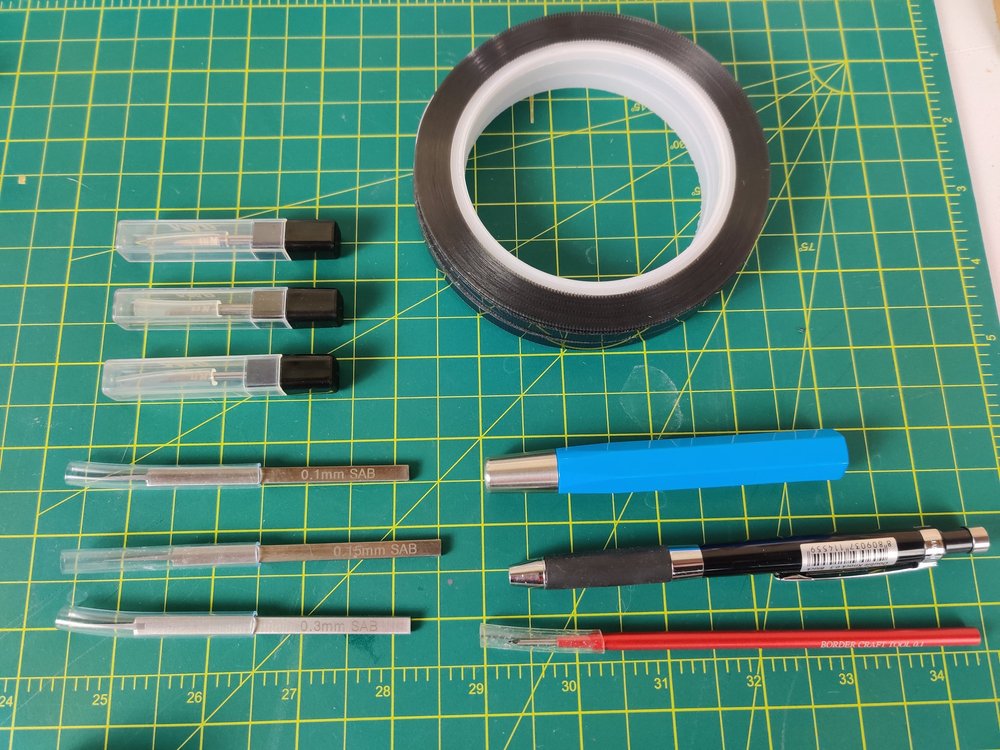
I’m very new to this aspect of gunpla so I’m still learning how to utilize these tools. I start by drawing the lines on my kit with a pencil and refine them until I’m happy with them. Once I’m satisfied, I place the DSPIAE guide tape along the lines and use the Border Craft Tools engraver to etch a starter line in to the plastic. After that’s done I use the SAB chisels to add a bevel to the edge of the new panel line.
When I have more skill in this department, I’ll make a guide and talk more about it. For now, I’ve got a lot to learn!
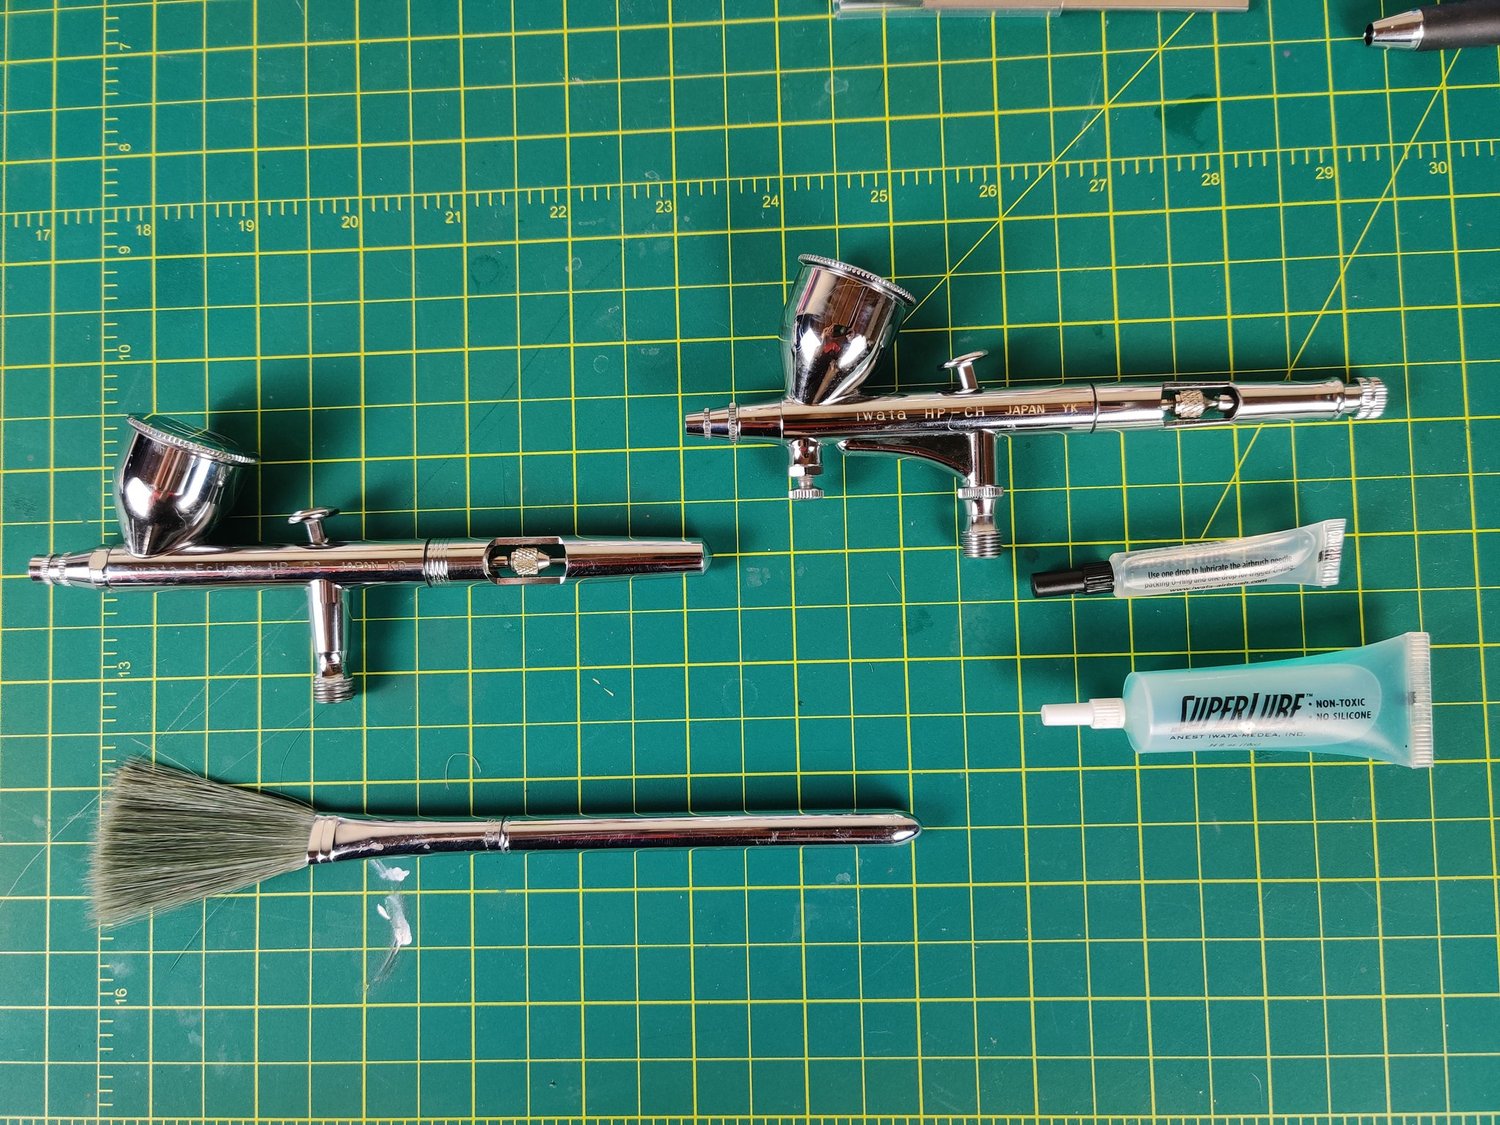
The HP-CS is a .3mm nozzle, dual action gravity fed airbrush and that makes it perfect for general purpose use. With a nozzle/needle of that size, you’re able to spray primer, regular use and metallic paint easily and with a little practice, you can do fine details too.
The HP-CH sports a .2mm nozzle and a dual action trigger with a gravity fed cup. The perks of the HP-CH are that it has a micro air control valve (MAC) and a chuck that can be used to set how much the nozzle opens up when you’re spraying. It does make it easier to perform techniques like the mottled effect and preshading but a .2mm nozzle is not mandatory to do those things. In fact, the smaller opening makes the HP-CH less ideal for spraying metallic paints or paint with bigger pigments so when buying your airbrush consider what you’ll be using it for.
There are also plenty of other brands out there that are rock solid for airbrushing so don’t be afraid to look at the different options out there to find something that suits you properly. Comfort with your tool comes before almost anything else!
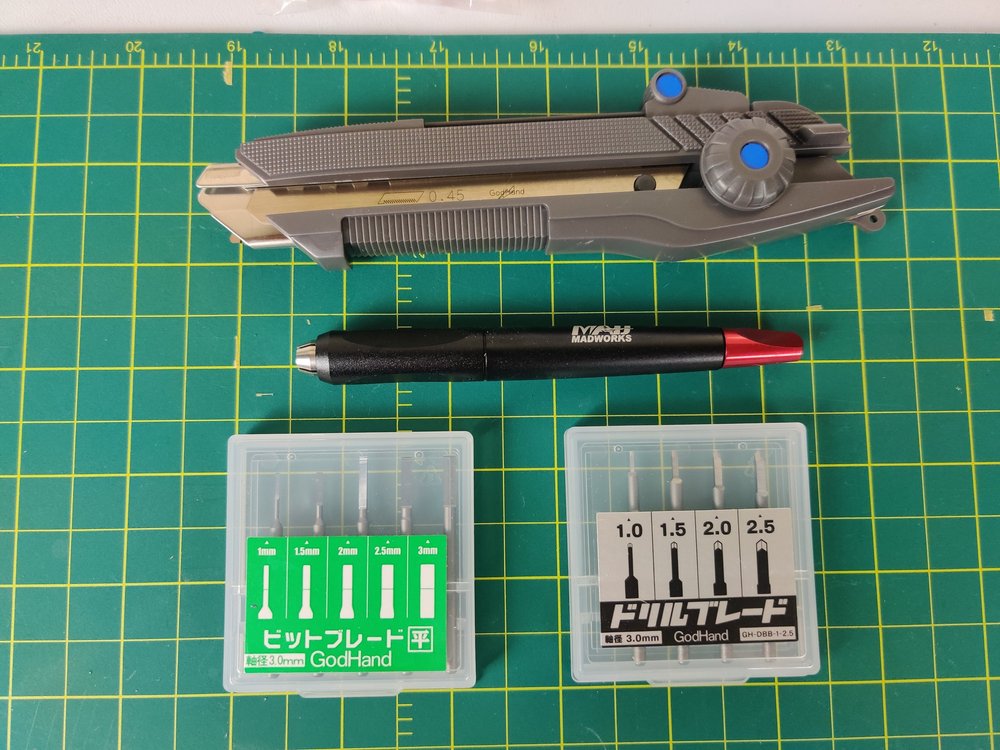
I haven’t had a chance to use either of these tools on a build yet, but they’re ready to go when I need them. The Gundam Pro Technic 02 guidebook has some very helpful advice on how to use tools like the drill bits to add incredible detail to your models that I can’t wait to try out. The Mighty Handy Saw is another great tool to have at the ready so I don’t have to use sidecutters to hack up plastic parts, or if I need to make a clean cut on something to keep the aesthetics of the part (say, creating a new joint by combining or modifying existing joints) looking nice and neat.
And that’s it for now! However, this section will constantly be expanding because I’m always willing to experiment with new tools to see what they can do for my model building process. Keep your eyes peeled for updates on this page, or even writeups on some of the tools I listed here that I’ve been using for awhile.